4 Ways to Stabilize and Tape Broken Fingers
First Aid Means Acting Quickly
First-aid skills are important for everyone to learn. Whether it's a burn, broken bone or allergic reaction, knowing first aid and administering it properly and quickly can save someone's life. Broken bones are some of the most common injuries that require immediate first aid treatment. Treating a hand injury like broken fingers means knowing how to stabilize and tape broken fingers quickly to relieve pain and minimize damage to the hand.
- First-aid skills are important for everyone to learn.
- Treating a hand injury like broken fingers means knowing how to stabilize and tape broken fingers quickly to relieve pain and minimize damage to the hand.
What You Need on Hand
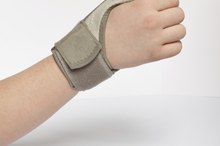
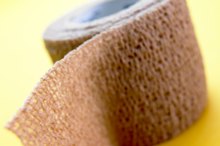
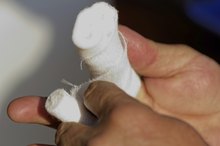
The two pieces of first-aid equipment you need to stabilize and tape broken fingers are a splint and tape. First-aid tape is often called paper tape or injury tape. First aid tape holds the splint and the finger securely. First-aid tape or paper tape is usually waterproof, and you can remove it from the skin easily without tearing or worsening the wound. Standard medical splints are made of stainless steel and sometimes have a layer of foam to help cushion the broken digit. They are slightly curved to lay naturally under the finger and hold it in place.
- The two pieces of first-aid equipment you need to stabilize and tape broken fingers are a splint and tape.
- First-aid tape or paper tape is usually waterproof, and you can remove it from the skin easily without tearing or worsening the wound.
Stable and Steady
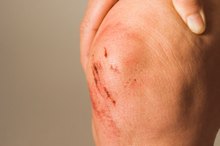
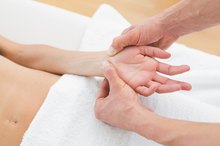
The first step in administering first aid to an injured hand is stabilizing broken fingers. Examine the fingers first and verify that no bones have broken through the skin. A break that bad requires more serious medical attention than a splint, so seek treatment immediately. If the break isn't that serious and you can stabilize and tape the broken finger, slowly straighten the broken finger. Don't force it; broken fingers will not straighten out all the way. Straighten out the unbroken finger next to the broken finger so the two are level. Position the splint under the broken finger and center it so the finger is in the middle of the splint, resting on top of it.
- The first step in administering first aid to an injured hand is stabilizing broken fingers.
- If the break isn't that serious and you can stabilize and tape the broken finger, slowly straighten the broken finger.
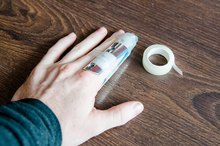
Tape It Up Tight
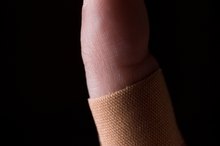
After you've stabilized the broken fingers, you need to tape the fingers to hold the broken finger straight and immobile. Taping broken fingers is a delicate process that could be painful, so work slowly and gently. Hold the tips of the two fingers together and adhere the end of the tape to the unbroken finger. Wrap the tape around both fingers and the splint, taping them together. Wrap around both fingers slowly, overlapping each layer of tape slightly so that they hold together well. Tape all the way up both fingers to the well of the fingers where they meet the hand. Both fingers should be taped and immobile when you are finished.
- After you've stabilized the broken fingers, you need to tape the fingers to hold the broken finger straight and immobile.
Related Articles
How To Splint a Finger
Learn More
Rehabilitation for a Broken Kneecap
Learn More
Types of Finger Splints
Learn More
How to Tape Injured Thumbs
Learn More
Homemade Thumb Splint
Learn More
A Torn Ligament in a Thumb
Learn More

How to Splint a Strained Thumb
Learn More

How to Wrap Achilles Tendon
Learn More
How to Tape a Finger for Basketball
Learn More
The Duration of a Broken Finger
Learn More
References
Writer Bio
This article was written by the CareerTrend team, copy edited and fact checked through a multi-point auditing system, in efforts to ensure our readers only receive the best information. To submit your questions or ideas, or to simply learn more about CareerTrend, contact us [here](http://careertrend.com/about-us).