How to Assemble a Blood Pressure Cuff
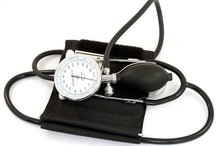
A blood pressure cuff is a piece of medical equipment used to measure an individual’s blood pressure. It contains several individual parts and may need to be assembled prior to use. A blood pressure cuff is composed of a cuff (or sleeve), a meter, an inflation bulb, and hoses that connect everything together. Knowing how to put a blood pressure cuff together can help an individual replace broken or worn out pieces when needed.
If you are experiencing serious medical symptoms, seek emergency treatment immediately.
Assemble the cuff. Locate the place on the bottom of the cuff where the hoses attach. The hoses will connect side by side. Attach them to the blood pressure cuff and tug gently to assure they are attached.
Does Hydrogenated Peanut Butter Have Trans Fat?
Learn More
Attach the inflation bulb. Connect one hose to the inflation bulb by placing the open end of the hose over the connector and pushing it down until it is secured. Gently tug on the inflation bulb to verify that it is secured to the hose. The inflation bulb can have either a lever or screw which allows the air to be held in the cuff and then released. The lever will have two positions; one for allowing the cuff to hold the air, and one to release the air. If the inflation bulb uses a screw, it will tighten and hold air when screwed in one direction, and release air when screwed in the opposite direction.
Attach the meter. The meter, which is usually round in shape, will have a metal or plastic piece that protrudes from one end. Attach the meter to the cuff by connecting the remaining hose and pushing the open end of the hose up and over the protruding part of the meter. Gently tug on the meter to assure that it is attached securely.
Instructions for How to Calibrate a Sphygmomanometer
Learn More
Test the blood pressure cuff to ensure that it is working properly.
Related Articles
Does Hydrogenated Peanut Butter Have Trans Fat?
Learn More
Instructions for How to Calibrate a Sphygmomanometer
Learn More
How to Put on a Knee Brace Properly
Learn More
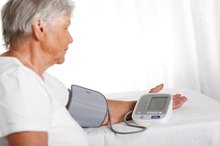
How Do Automatic Blood Pressure Monitors Work?
Learn More

How to Attach a Light Pressure Switch to an AR-15
Learn More
How to Adjust Pressure on a Respironics CPAP Machine
Learn More
How to Put on a Hospital Gown
Learn More
How Can I Tell If My Heart Rate Monitor Needs a New Battery?
Learn More
How to Calibrate a Blood Glucose Monitor
Learn More
How to Fix a NordicTrack Ski Machine
Learn More
Writer Bio
Rachel Dennis has been a health-care provider for many years. Writing since 1994, she has publications both online and in print. Dennis uses her experience in health care to help break down the medical world into terms that are easy to understand.