How to Access a Port With a Huber Needle
An implanted port, usually referred to simply as a port is often placed in patients requiring long-term IV treatment cancer patients receiving chemotherapy come to mind as they receive multiple rounds of chemo over an extended time period. A nurse certified in port access can access the port with a Huber needle for other types of IV medications and fluids.
If you are experiencing serious medical symptoms, seek emergency treatment immediately.
Cancer patients may be hospitalized for conditions unrelated to their cancer diagnosis; the port allows IV access with only one needle stick. A port may also be used to draw blood for lab work. Patients with ports typically have very poor veins and accessing them is almost impossible.
Prepare Equipment
Before beginning, wash your hands. Since the port is in a major blood vessel, aseptic technique minimizes the risk of infection. Placing the Huber needle is a sterile procedure. Wear a mask while performing this procedure. Don sterile gloves and open central line kit, using the inside as a sterile field.
Types of Surgical Staples Used Internally
Learn More
Open Huber needle packaging and place needle in sterile field, being careful not to touch any non-sterile surface with any part of needle. Attach a 10cc syringe of normal saline to end of tubing attached to needle. Flush until tubing is primed with saline.
Palpate the implanted port for the center of the port. The insertion site feels spongy. After identifying insertion site, don sterile gloves. Clean the insertion site with chlorahexidine swab or as per your facility's protocol. Begin at the center, working outward. Allow the site to dry thoroughly.
- Before beginning, wash your hands.
- Clean the insertion site with chlorahexidine swab or as per your facility's protocol.
Accesing Port
How to Irrigate Foley Catheters
Learn More
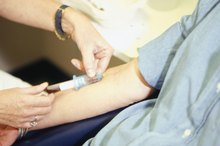
Remove needle guard from Huber needle. Place two fingers on either side of port site with non-dominant hand to stabilize skin around port. Holding the needle with the other hand, grasp the flexible "wings" using the thumb and middle finger. Firmly insert the needle at a 90 degree angle until you feel the end of the needle hit the back of the port.
Carefully release the needle, warning the patient to lie still as needle is not secure. Attach a 10cc syringe of normal saline to end of tubing. Pull back and aspirate to confirm blood return. Flush tubing using all of normal saline syringe. Secure the needle per your facility's policy. Some facilities may not allow tape to be used. Cover site with transparent dressing, ensuring that entire site is covered.
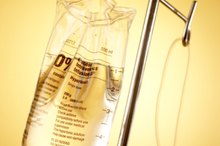
Mark dressing with date, time, and your initials in designated area on dressing. Clamp tubing if no infusion or medications are to be given; otherwise, attach IV tubing and begin infusion. Clear away trash, disposing of syringes and any sharps in approved sharps container. Wash your hands and document the port access in the patient's chart. Monitor the site and flush per your facility's guidelines.
Tips
Beginners may find it easier to have someone help them the first few times they access a port. This person should be experienced in port accessing and troubleshooting, and should be able to take over the procedure if needed.
Warnings
Only nurses certified in accessing implanted ports should attempt to access a port. Do not allow any part of the needle or tubing to become contaminated, strict aseptic technique must be used to prevent potentially fatal infections. Document placement of access and check regularly for patency. Follow your facility's guidelines on flushing port and dressing changes.
- Remove needle guard from Huber needle.
- Wash your hands and document the port access in the patient's chart.
Related Articles

Types of Surgical Staples Used Internally
Learn More
How to Irrigate Foley Catheters
Learn More
Venipuncture Methods
Learn More
How to Measure a PICC Line With Dressing Change
Learn More

Common Venipuncture Sites
Learn More

How to Remove a Catheter
Learn More

How to Prevent Infection in Pierced Ears
Learn More
How to Adjust the Airflow on a ResMed CPAP S6
Learn More

Venipuncture Complications
Learn More
How to Donate Old Blood Glucose Monitors
Learn More
References
- Goossens GA. Flushing and locking of venous catheters: available evidence and evidence deficit. Nurs Res Pract. 2015;2015:985686. doi:10.1155/2015/985686
- Hirsch L, Gibney M, Berube J, Manocchio J.Impact of a modified needle tip geometry on penetration force as well as acceptability, preference, and perceived pain in subjects with diabetes. J Diabetes Sci Technol. 2012;6(2):328-35. doi:10.1177/193229681200600216
- Tadicherla S, Berman B. Percutaneous dermal drug delivery for local pain control. Ther Clin Risk Manag. 2006;2(1):99-113.
- Cataldo, R., Costa, F., Viticello, M. et al. The Mystery of the Occluded Port That Allowed Blood Withdrawal: Is It Safe to Use Standard Needles to Access Ports? A Case Review and Literature Report. Journal of Surgical Oncology. 2014. 109(5):500-503.
- Goossens, G., Moons, P., Jerome, M., and M. Stas. Prospective Clinical Evaluation of the Polyperf Safe, A Safety Huber Needle, in Cancer Patients. Journal of Vascular Access. 2011. 12(3):200-6.
- Guiffant, G., Durussel, J., Flaud, P., Vigier, J., and J. Merckx. Flushing Ports of Totally Implantable Venous Access Devices, and Impact of the Huber Point Needle Bevel Orientation: Experimental Tests and Numerical Computation. Medical Devices (Auckland). 2012. 5:31-7.
Tips
- Beginners may find it easier to have someone help them the first few times they access a port. This person should be experienced in port accessing and troubleshooting, and should be able to take over the procedure if needed.
Warnings
- Only nurses certified in accessing implanted ports should attempt to access a port. Do not allow any part of the needle or tubing to become contaminated, strict aseptic technique must be used to prevent potentially fatal infections. Document placement of access and check regularly for patency. Follow your facility's guidelines on flushing port and dressing changes.
Writer Bio
Roma Lightsey has written for "Grit," "Arthritis Today," and "The Clinical Advisor," a journal for nurse practitioners. Lightsey holds a Bachelor of Arts in communications, a Bachelor of Science in nursing, and a Masters of Science in nursing. She currently teaches nursing and works for a medical device company when not busy writing.